
You will need to prepare #25 cotton embroidery floss in white. #25 embroidery floss is made up of six strands twisted together. I separated them into groups of three for this project.
1) Let's take a good look at the pattern of gingham check first. It is made up with squares of white and two tones of another color (which is purple in this tutorial). Stitch along horizontally with Running stitch. These stitches should go over the light purple squares in the middle.

2) Do same thing but vertically this time. There you will see many white squares which have four arms sticking out of each sides.

3) Bring the needle up through the fabric from where one of four arms touches to the side (of a white square) .
Thread under the other three arms around the white square then insert the needle back into where it first came out.

There is a figure I drew. I hope you will get the idea what I am trying to say from this picture.

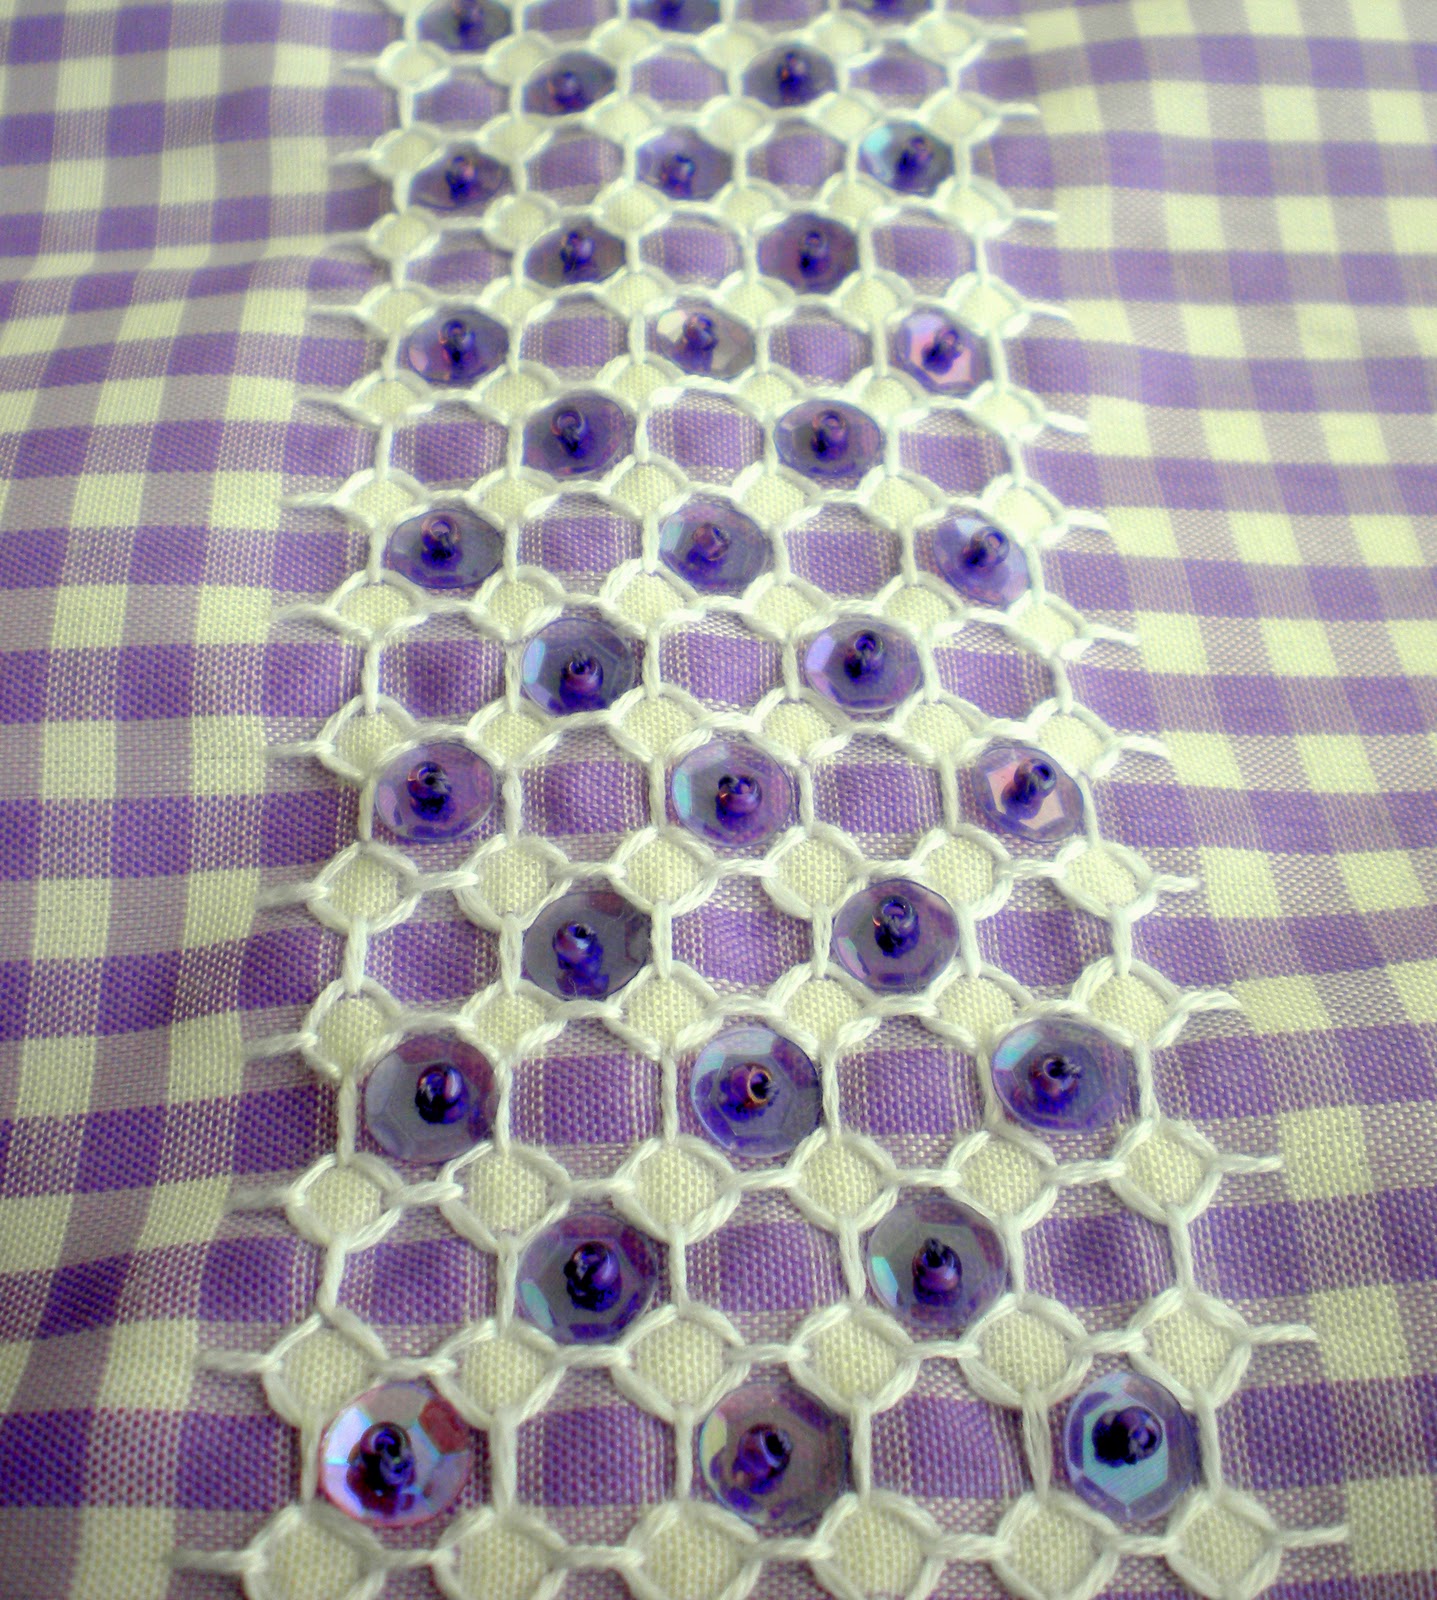
4) You will see many purple octagons and little white diamonds in order. Get a fine needle (has to be able to pass through a seed bead) loaded with a hand sewing thread. I doubled the thread for durability. Bring the needle up through the fabric in the center of a octagon. Pass through a sequin and a seed bead. Then go back through the same sequin again and insert the needle back into where it first came out. A sequin is attached. I put them alternately for this design.

5) Done!

It is a very simple and easy work but it makes interesting texture, doesn't it? There are some more techniques for using the character of the Gingham Check like Smocking and Cross stitch. I would love to introduce those techniques sometime in the future.
This Embroidered piece will be used for a new clutch. I hope you enjoyed this tutorial and try this technique sometime. I am looking forward to hear your review of this tutorial.
Have a happy weekend (with your embroidery needles perhaps)!
* * * * * * * * * * * * * * * * * * * * * * * * * * * * * * * *
P.S.....This tutorial is featured on CRESCENDOh.com on January 23 2011. Thanks!
I love embroidery but have never tried to use it to make a pattern on gingham. Thank you so much for sharing this! I want to try it.
ReplyDeleteThis is awesome because it looks great but is actually really simple to do. Thanks for sharing!
ReplyDeleteThank you Poppyprint and Cristy!
ReplyDeleteI hope you enjoy this and please tell me if you tried.
Thanks for this great post & Tutorial Hiromi,
ReplyDeletealways have loved gingham and just beginning with embroidery so this is perfect for me,
we have lots of traditional gingham type fabrics here in bali and think some cushions maybe on the cards,
Thanks again,
love your blog and have bookmarked you for inspiration! xxx
GREAT idea, Hiromi! Love your blog and ideas. Thank you for sharing.
ReplyDelete