Anyway, I am going to share a quick tutorial for making a body pillow (it's called Huggy in this house) using an old blanket and a small amount of fabric. One day my daughter sew a body pillow on TV commercial or something and asked me to make one for her.

This is the pillow I am sharing the tuto today.
I started constructing variety of possible materials I can think of for making it in my mind. It seemed very easy to make the shape of exterior with fabric. But if I need to fill that with fiber filling, how much should I buy it? After awhile, when I was cleaning my daughter's bed, a MARVELOUS (at least I thought so) idea hit me.

Nina is modeling for me how to use her new pillow!
As you can see she is just pretending she is asleep, (she has her school uniform on yet!)
I edited the photo to look like she is in a dream......
This blanket has been with us at least seven years I believe. And it was already pretty much used since it was a hand-me-down from Nina's grandma. I have no idea how many years Grandma had it. So I needed to patch holes sometimes and even trimmed "Shabby" edges all around. That was worn-out pretty much. But on the other hand, it has gotten very soft so this was Nina's favorite blanket for years. Then, the (BIG) idea was to re-purpose this blanket as a filling of a body pillow.

I am going to show you how I make a blanket into a filling and how to make a fabric cover for it.

I folded and rolled the blanket. Than measure the dimension of the roll.

Stuff the blanket into the cover.

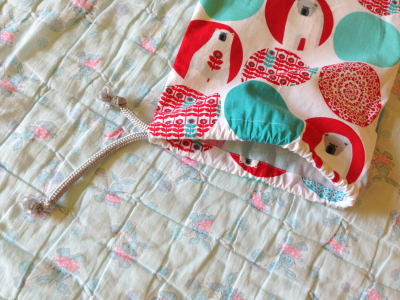
The cover is just a simple draw string bag with a round bottom. Only it is super loooooong.

Supplies ; ★An old blanket or quilt. (The size of my blanket is about FULL. If you have larger one, you will get a fatter pillow. The size doesn't mutter so much. If you thought the roll is too skinny, you could roll two blanket together for some more thickness.)
★Fabric which has nice and soft touch for your skin. (Mine was quilting weight 100% cotton.) The amount of fabric you will need is up to your blanket size. Please refer the measuring instruction below.
★Cotton cord. "a"x(3.14)+8" (Refer the measuring instruction below.)

How to fold and roll your blanket.

You need two measurement from your roll which are the diameter of bottom "a" and the length "b".


Sew the bottom to the side. Stitch zigzag around the seam.

Make knots on the ends of the cord so the cord won't easily come off.

Stuff your blanket roll into the cover. Pull and tie the cord. Tuck the knot into the pillow.

This is the finished bottom. Nice and clean.
Thank you for stopping by! I hope you all have a beautiful week!
Thank you very much for the tutorial: The fabrics are wonderful. Kisses from Spain
ReplyDeleteGreat idea!
ReplyDeleteÓtima idéia!
ReplyDeleteUm abraço!
Egléa
Great idea!
Hugs!
Egléa
So easy and perfect. My little could use one of those. The biggest has a stuffed shark which he simply love.
ReplyDeleteNice blog by the way.
Happy Easter.
Bente